How to Cut a Shirt Into a Tank
Brace yourself, it's time for arts and crafts. An unexpected side effect of racing a lot is that I have a ridiculous number of t-shirts. They are typically unisex (which really means: men's sizing and fit, you aren't fooling us race directors), bulky, and unflattering. A few years ago, on a whim, I decided to cut one into a tank top for the gym. It worked, and I loved it, and have done this to a number of t-shirts ever since. So I thought I'd present my "how to cut a shirt into a tank top -no sewing required" tutorial – because I'm certain you too have a dresser drawer full of t-shirts not getting any love.
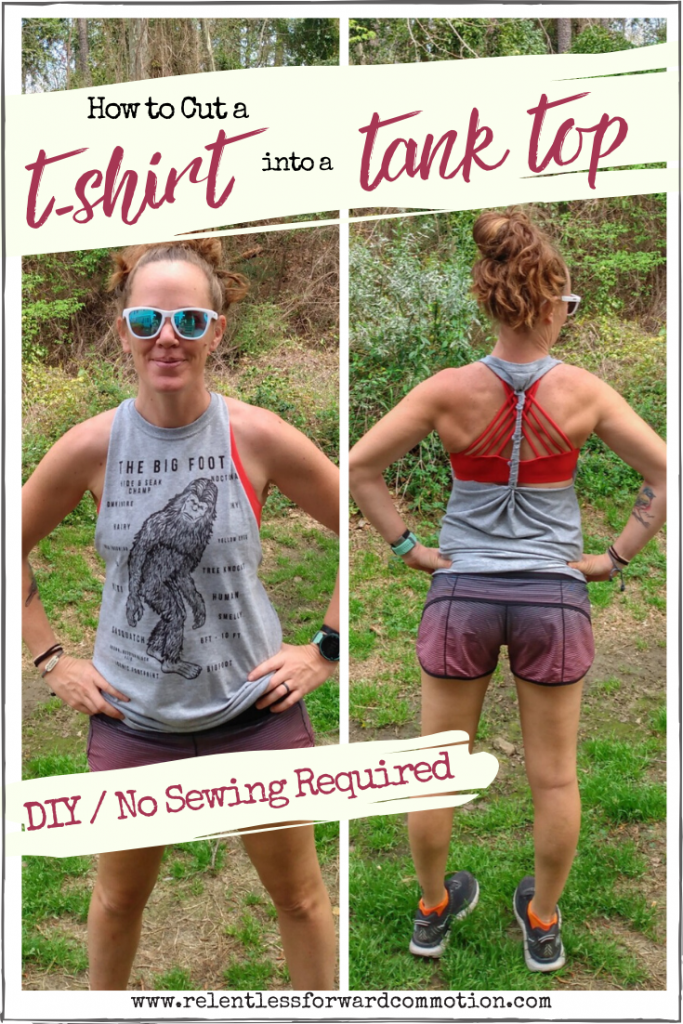
Here's what I love most about turning these shirts into tank tops:
- Greater range of motion in the arms (integral for gym workouts).
- Cutting out about 1/3 of the fabric makes them cooler, better ventilated.
- I'm not sure if you know this, but companies make some killer designed sports bras. I'm not one to workout in just a bra very often (it's not not comfortable for me and my mom stomach,) but I do have some cute bras. They deserve to be seen! These tanks still show off the designs/patterns while keeping me covered when I want to be covered.
- Speaking of mom stomach, it's loose around the torso, a must some days.
- It's 90 billion degrees down here in South Carolina. Sleeves are suffocating.
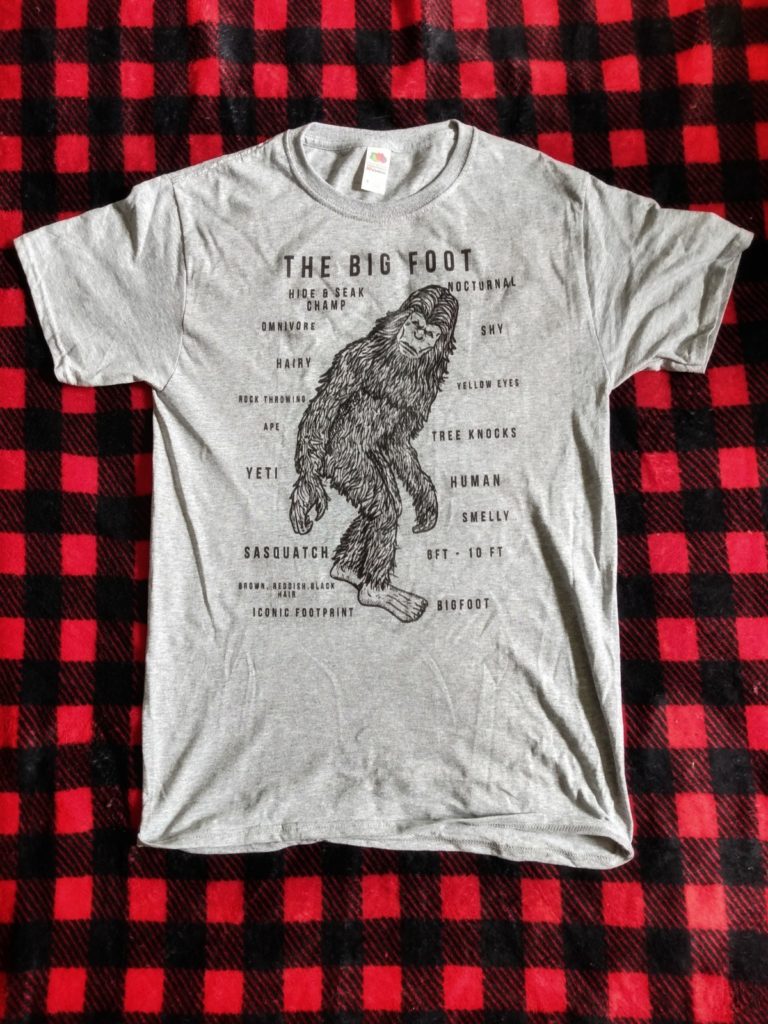
Two days ago I opened my mailbox to find a package addressed to me, with no return address or any other identifying markings. In it was a hilarious Bigfoot t-shirt. Dear mystery sender: THANK YOU! I absolutely love it, it put a huge smile on my face.
I looked at the shirt and immediately thought it would be a good candidate for a DIY racerback tank top. The design/logo is completely on the front (nothing on the back) and it's amazing and hilarious enough that I want to wear it often. I won't lie, I asked my husband "do you think they mystery sender will be mad that I immediately took scissors to my gift?". But then I realized that, as mentioned, regular t's rarely get worn. But as a tank, this will be in year round general rotation.
So, let's go.
How to Cut a Shirt Into a Tank Top (No Sew)
*Results not guaranteed. Though my mother is a wildly talented arts & craft-er, that apple did indeed fall far from the tree. I can't really sew, and I will never claim to be a craft blogger. But I've been using this method for at least 5 years now, and it's created some tanks I love that are still going strong. I'd highly recommend practicing on a NOT favorite tank top first. You know, just in case.
What you'll need:
- A T shirt (design/logo on front is your best bet)
- Scissors
- A washable marker or pen
- Sports bra or racer-back tank to trace
Step 1:
Lay your t-shirt flat on the ground or on a table. Now smooth it out, super flat, lining up the seams. You should probably do a better job than I did here.
Step 2:
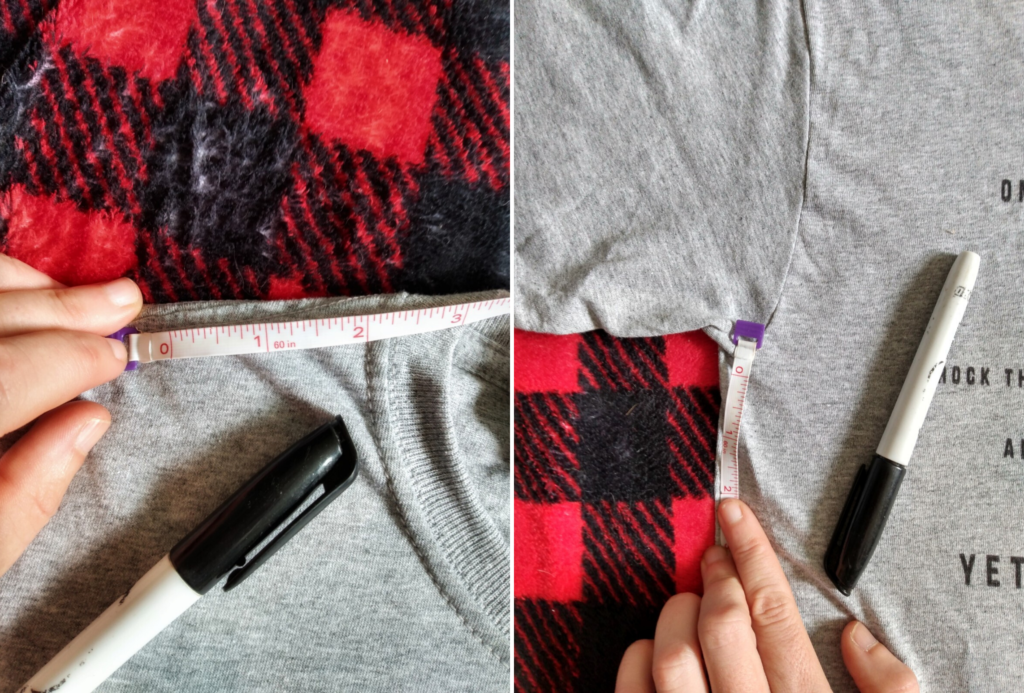
Take a ruler or measuring tape, and mark, with a washable marker or pen, two inches from the seam at the neck of the t-shirt on both sides. Personally, I like to keep the ring on the shirt, I like the way it looks. But feel free to use creative liberty here. Next, mark two inches below the seam of the sleeve, on both sides. If you want a super open tank, that shows more of your rib cage, you can go lower than 2 inches below the sleeve seam.
Step 3:
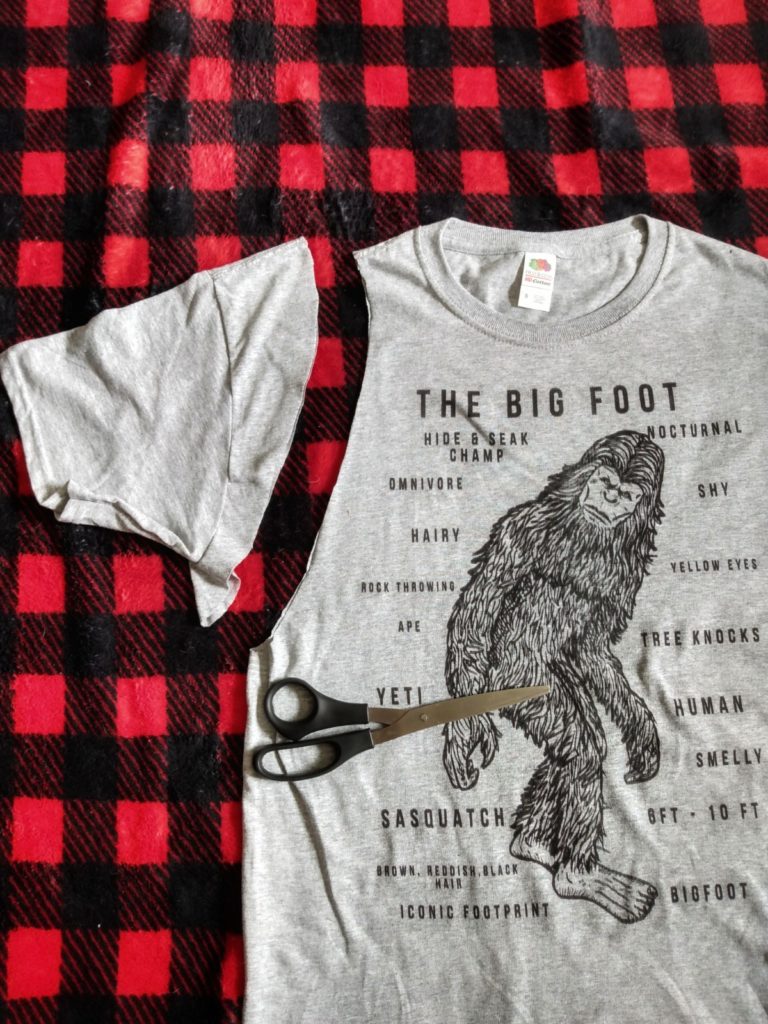
Alright, here's where it gets a little nerve wracking. It's time to cut! Use your scissors to cut just ONE sleeve off. Start at the bottom mark under the sleeve. Follow the natural curve of the sleeve seam, aiming for the mark you've made at the neck.
Step 4:
Now, fold your t-shirt in half, lining up the neck seams. This will allow you to trace your first cut, making an identical cut on the opposite side. You can use your pen or just eyeball it.
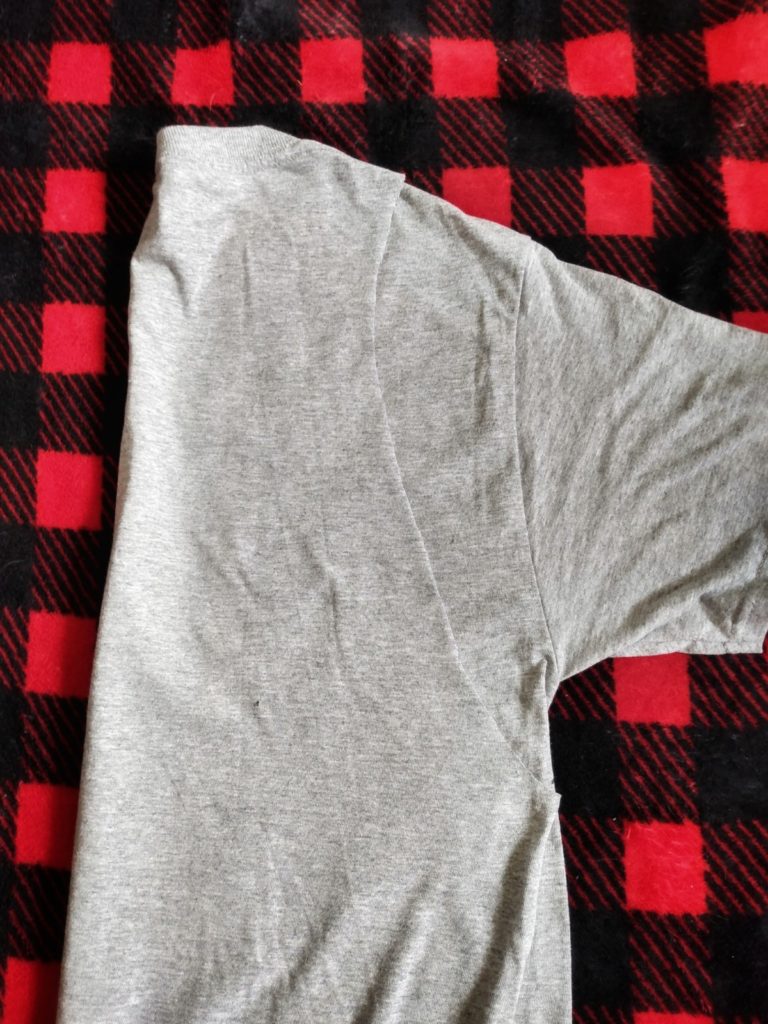
Make your second cut. Hooray, the first scary part is over! You haven't ruined your shirt (yet)! Don't throw away the sleeves yet…you're going to need them later.
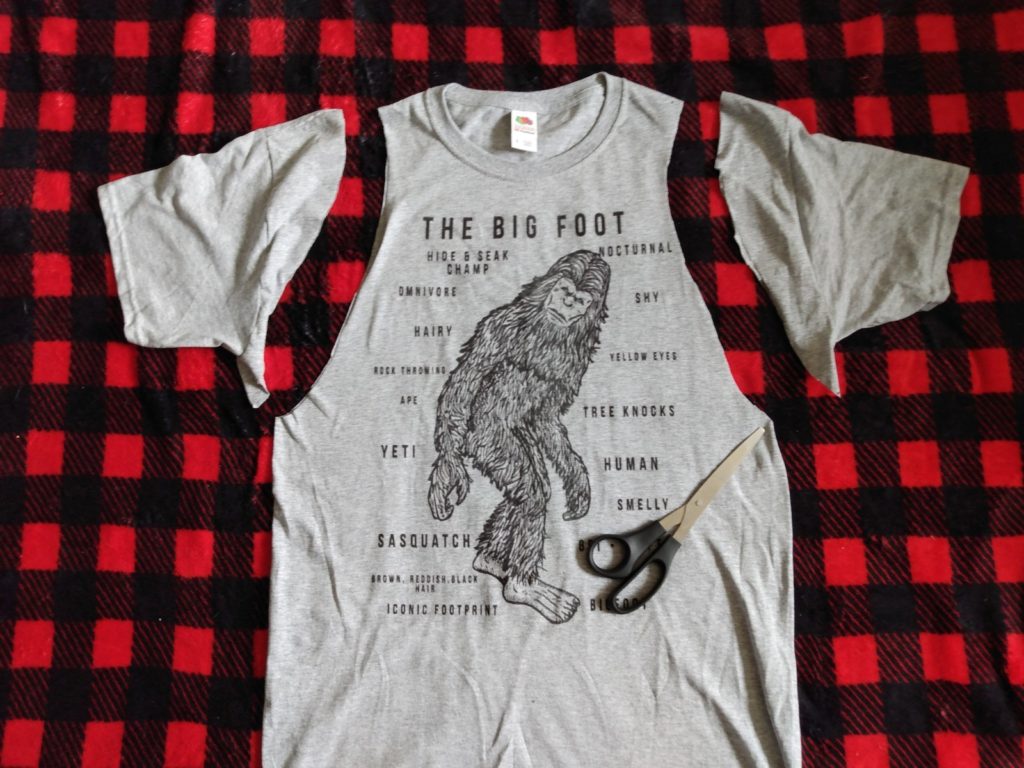
Step 5:
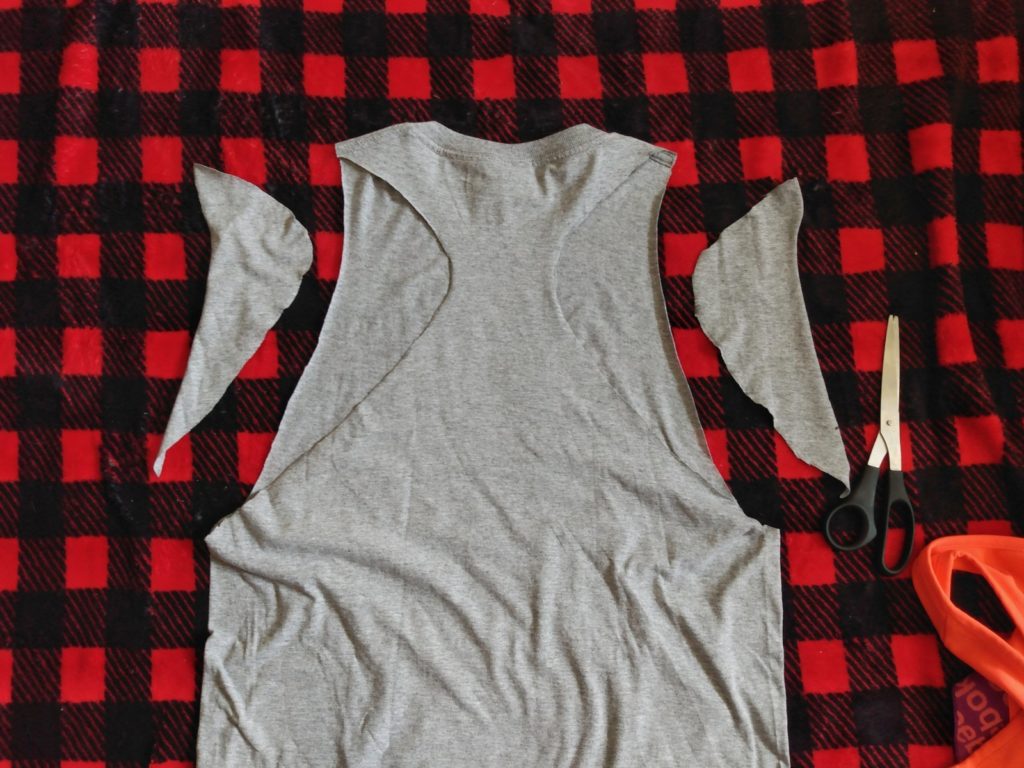
Flip your shirt over. Grab a sports bra with a wide, solid racer back strap, or find a racer back tank. Use it as a stencil. Line up the shoulders to the top of your soon-to-be-tank top. Trace the parts you can, and eyeball the rest.
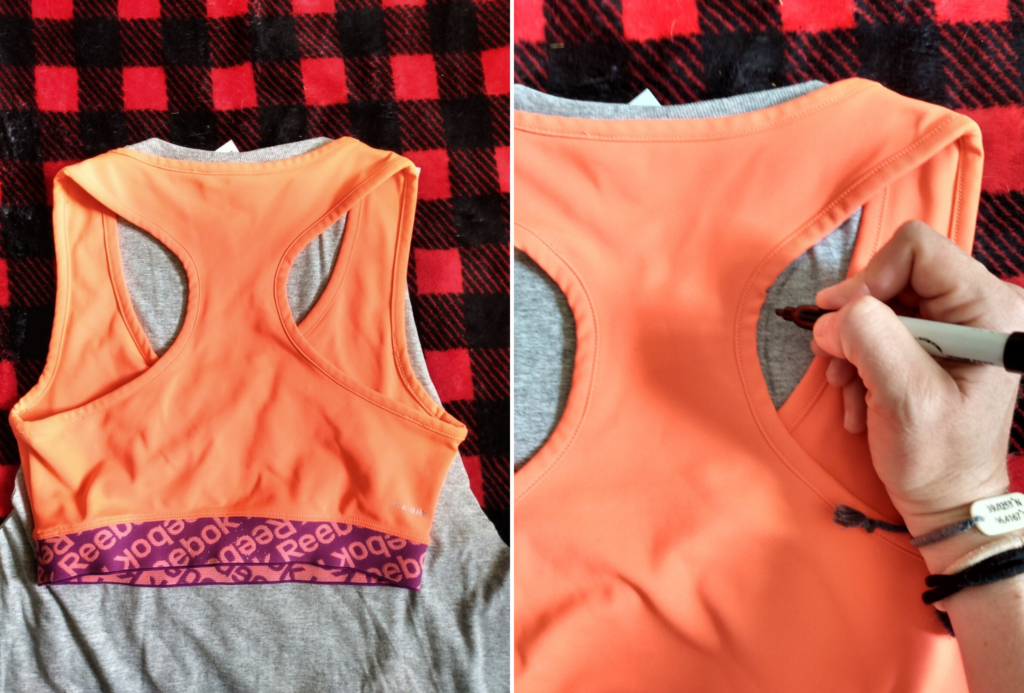
Step 6:
Using the lines you just drew, lift up the back of the shirt, and cut out the BACK SIDE of the shirt only. Seriously, don't cut through both layers or you're going to have a funny and potentially awkwardly shaped tank top.
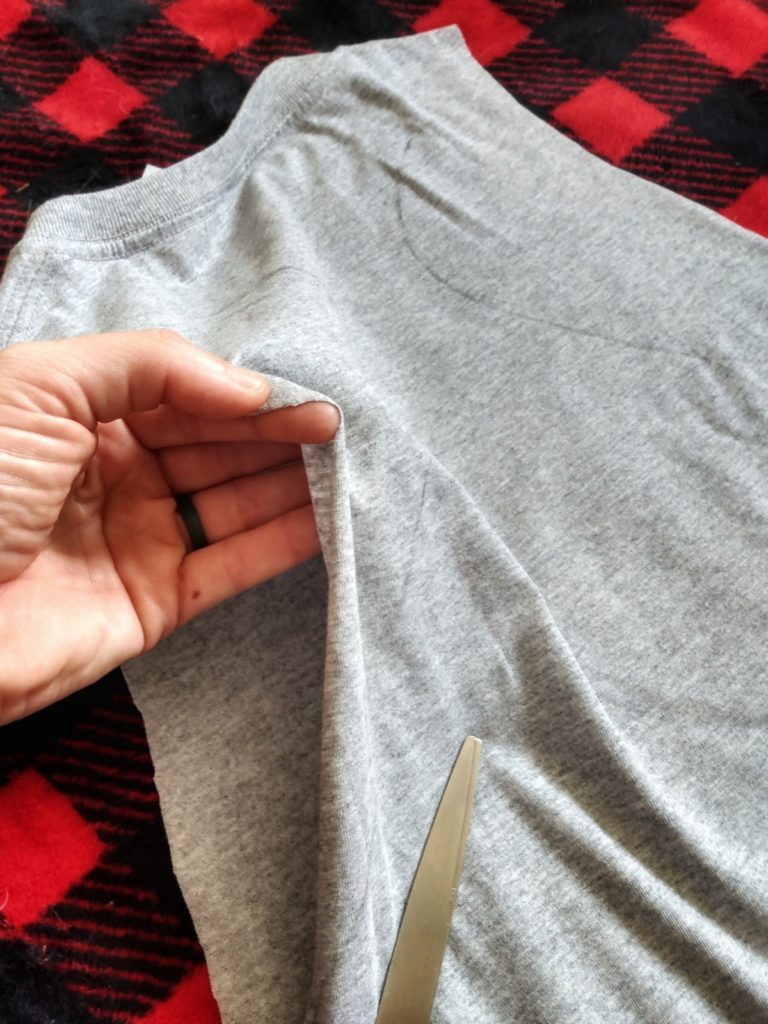
Hooray for you, the cutting is over!
Step 7:
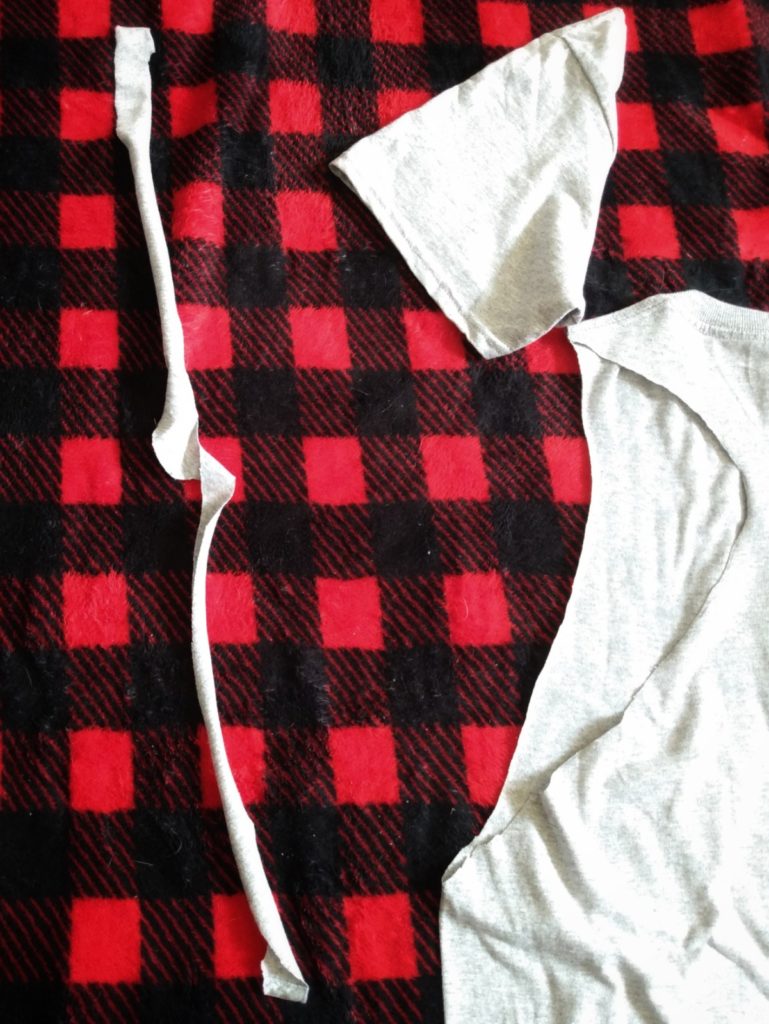
Take one of the sleeves that you've cut off. Now, cut a 0.5″ – 1″ wide strip of fabric from the sleeve. If you cut it carefully, you'll have yourself a loop. Cut that, you want one straight piece. Depending on how far you want the back of your tank to go down, you may need two pieces. Cut both sleeves, just incase.
Step 8:
Grab the back of the tank and bunch it together at the spot where you'd like the "racer back" portion to begin.
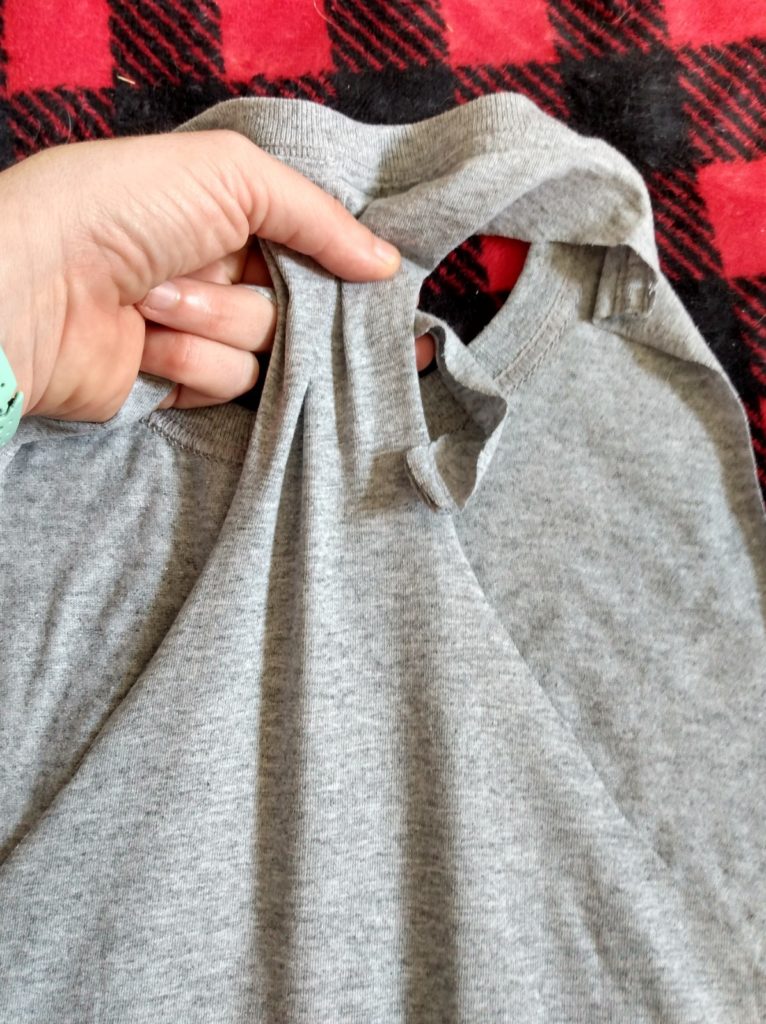
Tie your long strip of fabric in a tight knot, holding the bunched fabric together. Leave a longer end to the tie, you're going to wrap this into the shirt to prevent it from coming unraveled.

Step 9:
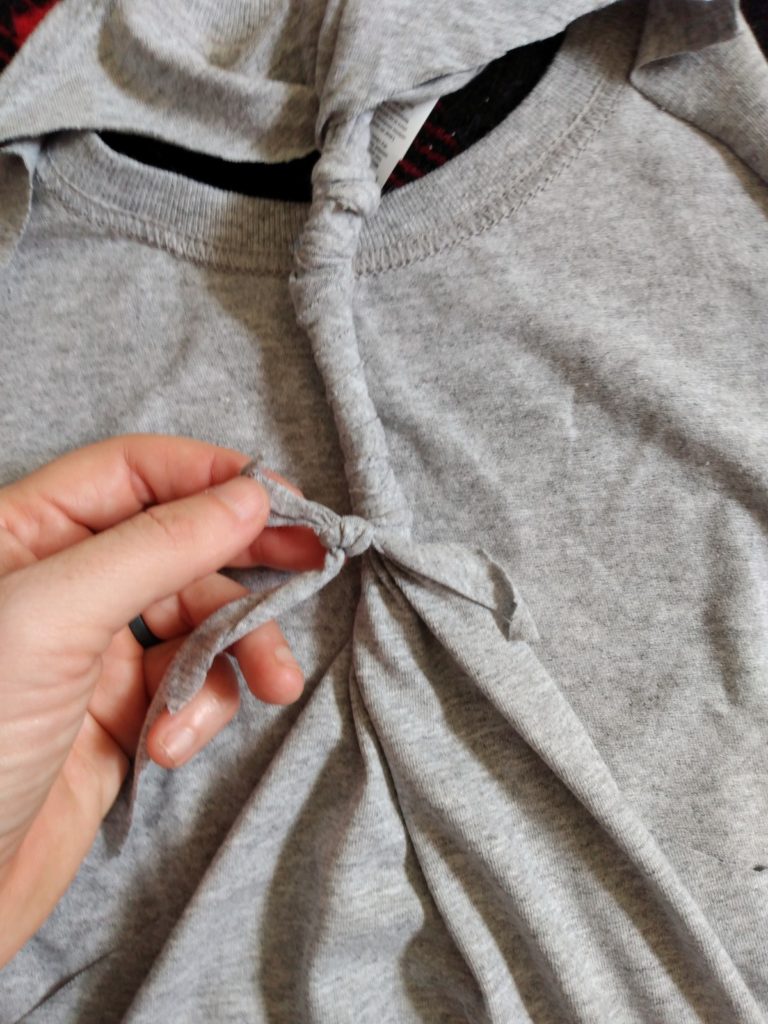
Begin winding the long piece of fabric "string" around and down the bunched racer back portion of your tank. As you go, tuck the short end of your string underneath as you go, to hide the excess fabric.
If you get to a point where you'd like to continue, but your string is long enough, tie another one on, and keep going!
Step 10:
When you've gone as far down the tank as you'd like to go (I went about 9 inches) tie another knot in the fabric. Then, use your finger to weave and tuck the excess fabric (beyond the knot) back into your twist. This will help prevent it coming untied or unraveling in the wash.

TA-DA! You've Got a Kick-Ass Tank Top!
Make any adjustments you want to length or fit now. Bedazzle it, cut off the bottom cuff, whatever you want. It's your tank top, go nuts!
Note: the cuts will get softer with washing, rolling slightly inwards to appear less sharp/harsh. These tank tops only get better with time!


Thanks for tuning in to our second episode of "Running Coach Attempts Arts and Crafts" . If you try this, let me know how it goes! If you have any other variations of this method, let's hear it!
How to Cut a Shirt Into a Tank
Source: https://relentlessforwardcommotion.com/how-to-cut-a-shirt-into-a-tank-top-no-sewing-required/